I finally upgraded to a big girl bed, having had a twin size bed for way too many years to mention. The new bed, which I still have, is a full size (may one day upgrade to queen) which is so comfy, has the pillow top feature and is high off the ground. Such a bed, needs a proper headboard!
Even as a kid, I was inspired by some of the bedrooms I saw at museums, where there were grand bedrooms with huge beds and very large and ornate canopies. I just love that stuff. Here are some illustrations from the Metropolitan Museum of Art in NYC.


Oh and another source of inspiration was that huge beautiful bedroom from Alfred Hitchcock's movie ~ Rebecca, one of my all time favorite movies! If you have never seen it, you HAVE to see it! Spoiler alert - if you haven't seen the movie, the link below is a scene from the movie that shows the bedroom I mentioned before.
http://www.youtube.com/watch?v=j7Rg8B16SJk&feature=fvsr
Anyway, these visuals give you great insight into what helped shape my aesthetic. Of course partially.
To make a grand bed, designing on a dime, in a rental, with limited space and working with built-ins, here is what I came up with.

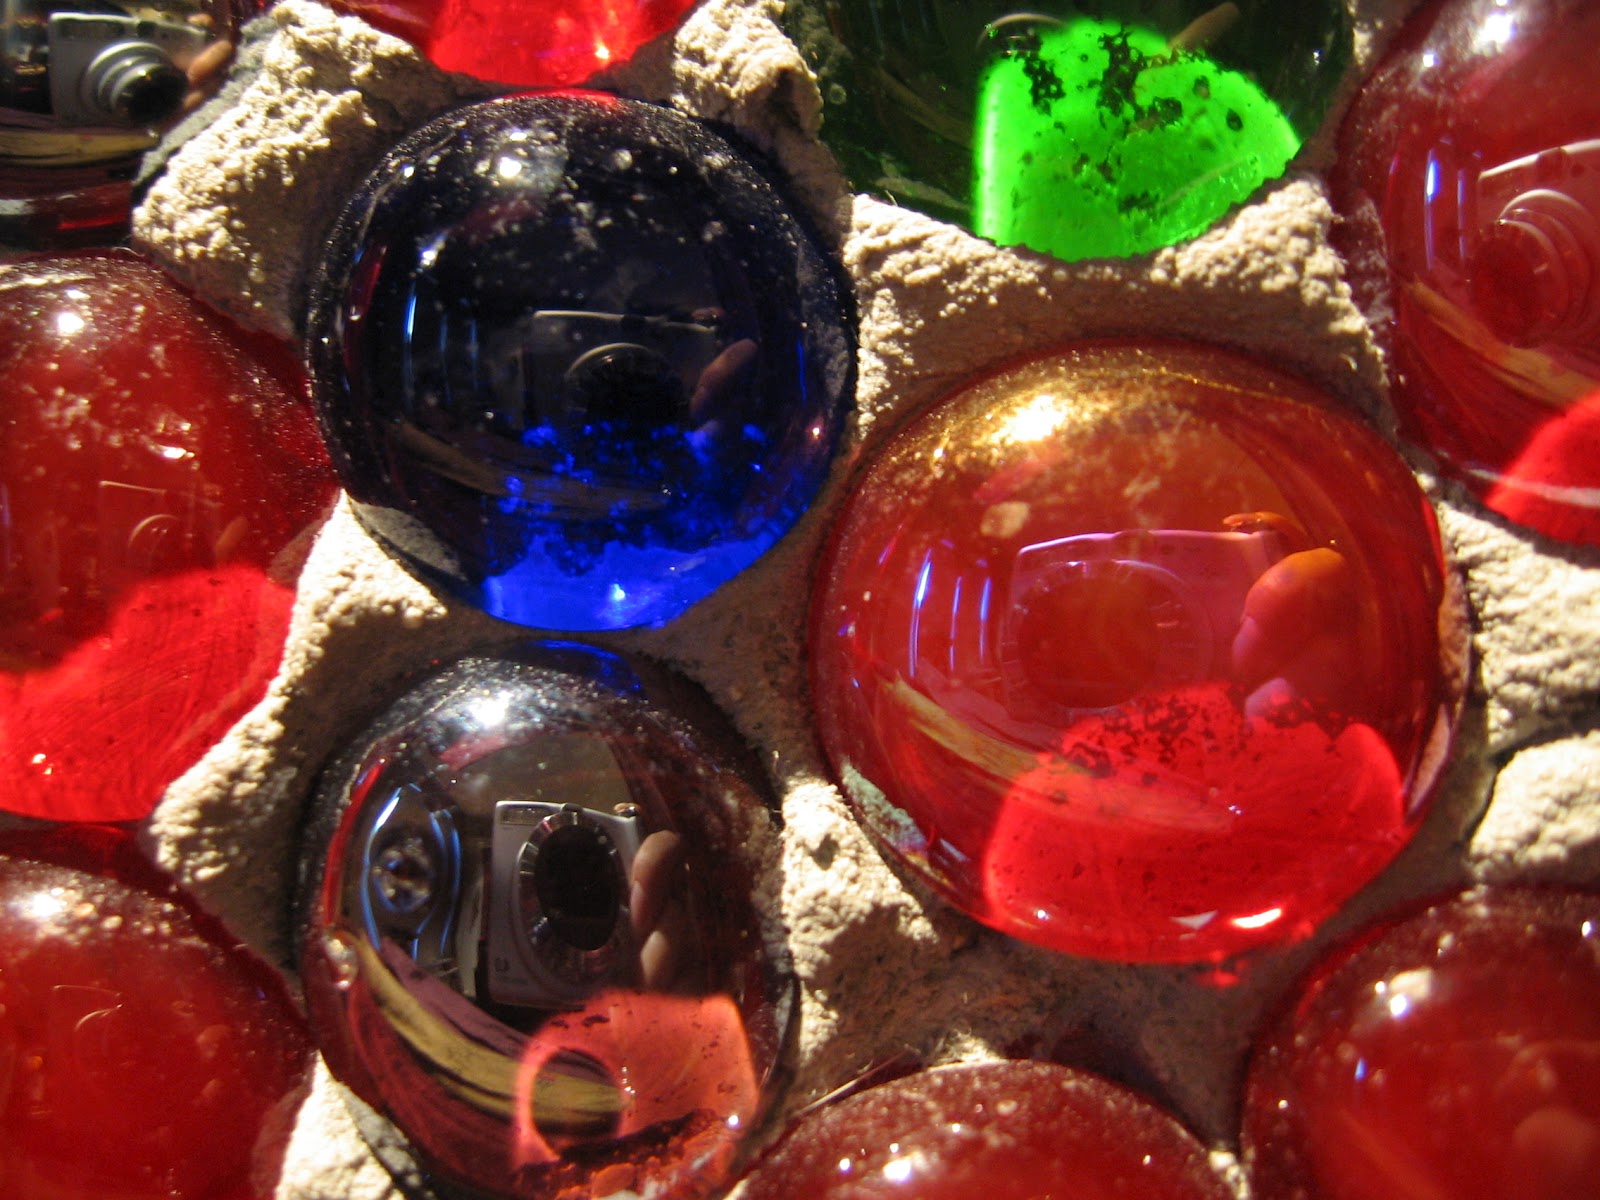
Below you can see a close up and different shots of the headboard which I made almost from scratch. I will explain that process in more detail.


As you will see from pretty much all of my posts, I love gems, jewels, diamonds, bling! I wanted a jeweled headboard, so I made one. I happened upon the metal gold/bronze frame at an antique store which was maybe $200. I thought this would be the perfect fit for my project because of the shape and color, but also because it had this lattice design across the middle in the same metal, which you can't see because it is covered up with the jeweled part, but it was perfect for inserting the jeweled piece and attaching it securely to the frame as a whole. My father helped me a little bit, by getting a piece of plywood cut to the size of the inside frame of the metal headboard. We went to Home Depot and I picked out molding to act as a frame around the plywood, which we then cut and I spray painted it metallic gold. Also at Home Depot, I got grout/cement in a light grayish color, so that it would blend into the background more and not be a contrast to the other colors. I had already purchased the flat backed glass pieces often used for floral decorations at the bottom of jars, which I found at a wonderful market store somewhere near or on Third Street, down in the village. Not sure it's there anymore. I got tons of the glass pieces, red for ruby, green for emerald, blue for sapphire and purple for amethyst. I also had found these three resin type white plaques at Bed, Bath and Beyond, that I incorporated into the design as well. The center plaque, I painted with enamel paint, and I was inspired by Ralph Lauren sheets called Galahad which I owned.

Here is a close up of the plaque.

Once I had all of the pieces and the frame built out and painted. It was time for assembly. I mixed up the grout/cement and spread it out on the plywood in sections. I started with the three plaques to center and position those and then, one by one, I placed each glass piece into place. I used more red than the other colors and had to make it look like random placing to give an even look.
A messy, very time consuming process but well worth it. After the last piece was in place, I waited several days for the project to dry and set. Once it was set, my father and I attached the project to the metal frame and hung it securely from the wall.
Overtime, I added a valance attached to the built-in above using a small tension rod which is inside the shelf. I covered the shelves on that side of the room so I could use them as storage spaces without it looking messy. Believe it or not, I used a canvas drop clothe which I cut up and sewed to insert a tension rod on the top. The red sheer drapes you see, were also hung using very small tension rods that wedged into the bottom of the built-ins. I also used wood tacks to tack down the curtains into a U shape, so they would envelope the headboard and bed. Using a curtain rod, which was cheap plastic, I added the decorative element of the medallions you see on either side of the valance. I also purchased red crystal chandelier parts and hung a pear drop from the center of the valance and two points on the corners of the valance. One last element, was the hanging candle pendants I happened upon one day. I hung them from the bottom of the built-in using these really pretty brass arms I found.

Unfortunately, you can't see the profile of the brass arm.

When I designed the new look of my old apartment, I very much wanted to try to create distinctive areas. One of which was a "bedroom". Not having a wall and door for my bedroom, I created a divider that I could close when going to sleep and open when I woke up to open up the space again. I used curtains, also from Bed, Bath and Beyond, to create this divide.

On the right side of the picture you can see the cream colored curtains being pulled back by a holdback. I used three curtains for this project. I sewed two panels together at the same length. Due to the built-in, I had to use a tension rod again to hold the third one into place, but then sewed the third panel to the other two at the starting point where they connected (if that makes sense). I had purchased a brass rod from Gracious Homes and a clear crystal finial to insert at the end of the rod that stuck out into the room. I then screwed in brass brackets into the ceiling to hold the rod and hung the curtains by using brass colored curtain rings. When I wanted to go to sleep, I would simply pull the curtains all the way across creating a divider which made my bedroom area more cozy. Each morning, I pulled the curtain and folded back using the holdback and there was an open space once again. It really made a huge difference while sleeping.
Oh and I always had that little disco ball hanging from the ceiling. Hee, hee, hee.
Next time, more on the other half of the room.
Thanks for stopping by and Stay tuned for more creativity!
No comments:
Post a Comment